How to Make Your Own Tattoo Gun

How to Make Your Own Tattoo Gun

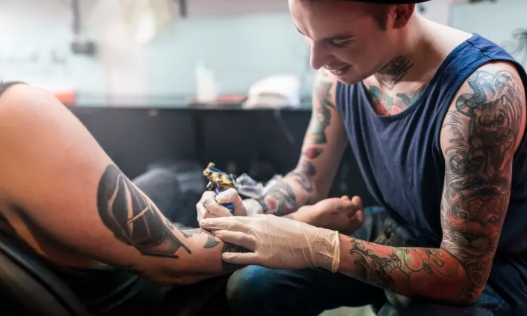
Tattoos can be a great way for an individual to define their personality. Getting a tattoo can be expensive. Reccommended by tattoo Artists, if it is difficult for you to go to a tattoo shop all by yourself, bring your personalized tattoos home. You can now follow a simple procedure to make a tattoo gun for yourself at home all by yourself using the basic tools which you can find around the house pretty easily. Prepare yourself to get some of that aesthetic ink on your skin to define who you are. You can also get better at tattoos once you get to practice more at home by using a homemade tattoo gun. The process of making your own tattoo gun is fairly easy.
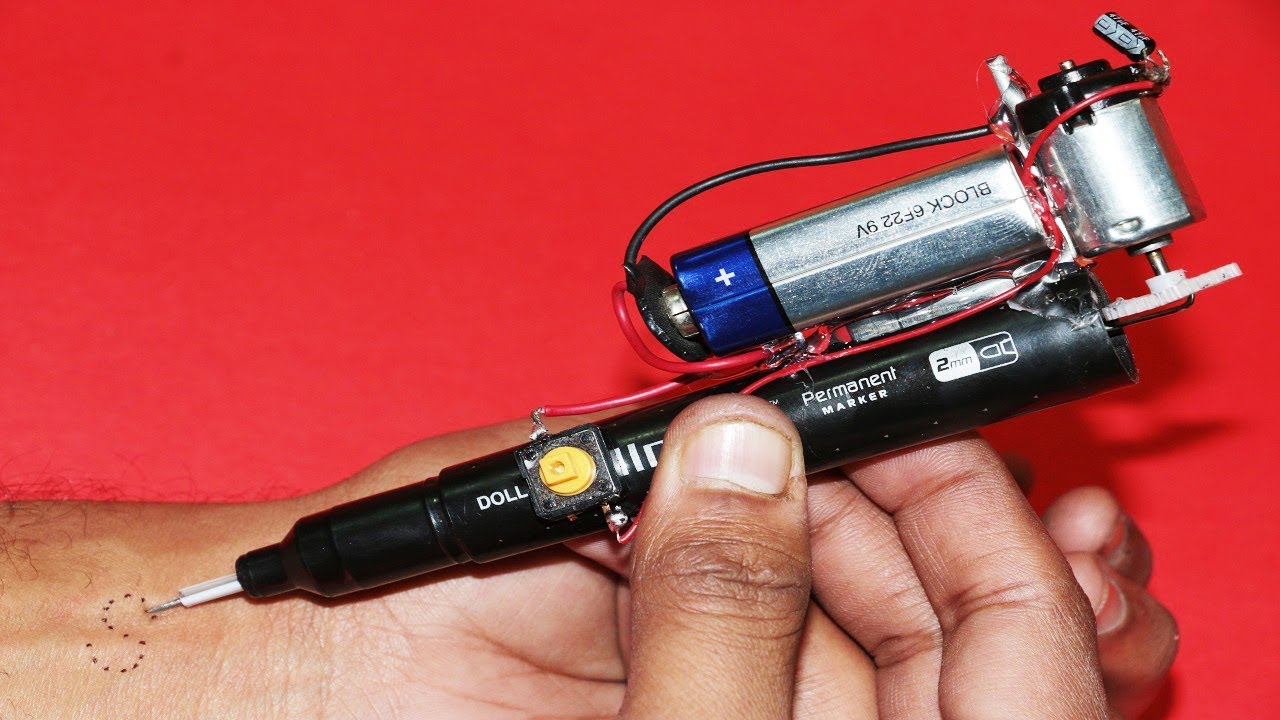

Tools for a Homemade Tattoo Gun:
For a homemade tattoo gun, you will need:

  • Battery/motor
  • A mechanical pen for the tube
  • A teaspoon or a toothbrush
  • A lighter
  • Metal strings for the needles
  • Liquid dish soap
  • Water
  • Tape
  • Sterilized Jar
  • Super Glue
    Once you gather all the tools, you can get to assembling your own tattoo gun.

The Process:
1. Mechanical Pen & The Motor
You need to make sure that the motor you are using has the power of 12 to 18 volts for the best results. You will find a small shaft in your motor. All you have to do is remove the eraser from the mechanical pen and pass it through the motor using a little bit of super glue. Remember to keep space for the needle.

2. Prepare The Tube
Using the same mechanical pen, simply file a small hole in the brass tip for the needle to pass through it. You can use a normal ballpoint pen as an alternative in which you will have to remove the ink tube entirely.
3. The Brace
This is for the support of your tattoo gun once it is attached to the motor. Simply split the spoon into two parts; the bowl and the part from where you hold a spoon. Using the lighter, bend the handle into an L shape. If a spoon is too much of a struggle, use a toothbrush for the L shape part.
4. Prepare The Needle
First, boil the liquid soap with water in a pan. While it is heating up, use a metal string which is longer than your tattoo gun tube. Boil the string in the water for five minutes. After five minutes, boil it in the normal water without the soap. Prepare a few needles in advance and keep them sterilized in a jar.

5. Attach Tube & Motor
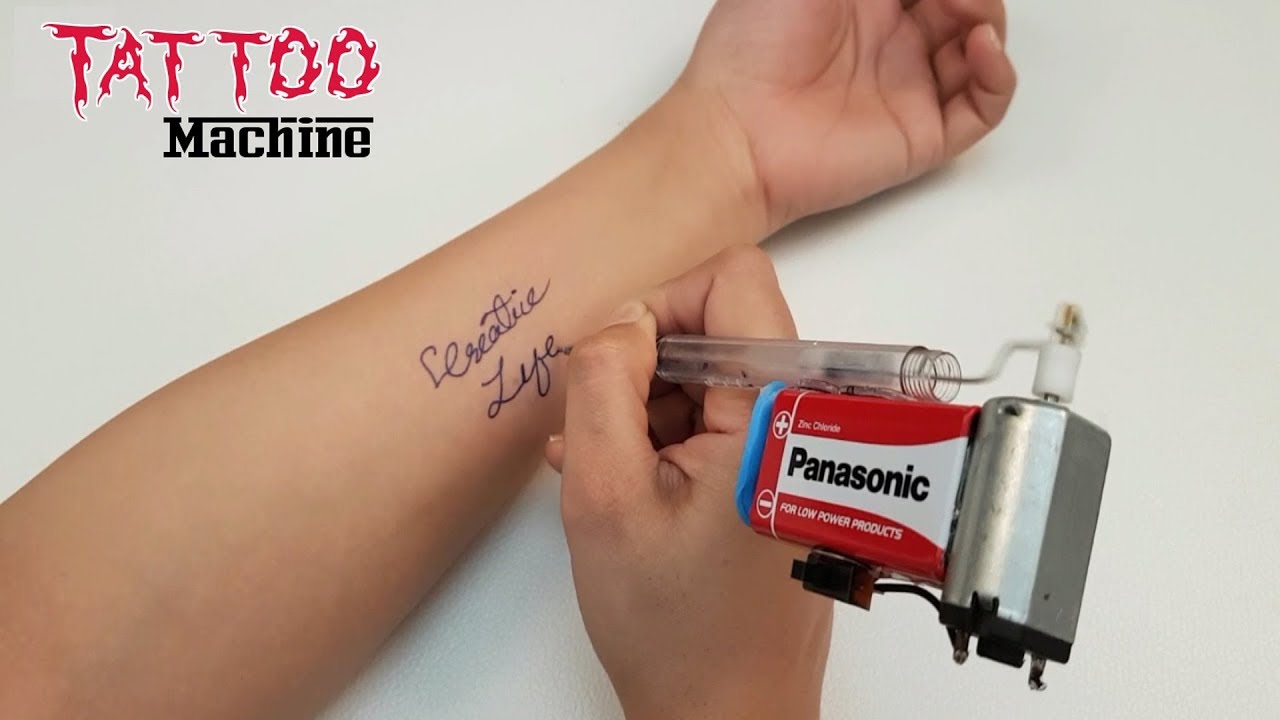
You have to use a tape here to firmly attach first, the tube to the spoon handle and then the motor. Make sure the pen’s open end and the curve in the spoon handle are lined up, tightly attached to each other. Then you can attach the motor to the remaining L shaped spoon handle which is the brace.
6. Attach Needle to the Motor
Now carefully insert the needle into the tube. Once its out from the other end, create a hook by folding the string several times into 90-degree angle at the end of your needle. Using the hook, attach the needle to the motor. It will go in and out on spinning the eraser attached to the motor.
7. Power Your Motor
Simply attach the wire of your power source to both the ends of the motor to bring it to life. Your tattoo gun is now complete.

Tip: Do not reuse the same needle and tube again. Discard used items at once for safety purposes.
Now that you have your tattoo gun prepared, give your tattoos a try and have fun!
Tattoo trends in Australia – A Big Yes And A Small No

Tattoo trends in Australia – A Big Yes And A Small No

Tattoos popularity in Australia

Tattoos are rapidly finding their market in Australia compared to a few years ago when they were regarded as a tabloid. This massive growth was mostly led by the tattoos designs that included a word or a phrase category. However, a recently conducted surveys reveal that around 70 per cent of Australian’s now prefer to have a symbol or picture getting tattooed on their body, compared to about 20 per cent who still goes for a phrase or a word tattoo design.

Whether job denial a possibility?

Australians cannot be denied employment by hiring managers because of body alterations involving tattoo designs. There is no legislation in force that prohibits people from endorsing tattoos on their body, unusual hairstyles and their colouring, body piercing, and so on. However, some professions may demand employees to cover tattoos at work such as police, law agencies, healthcare professionals, bankers, financial institutions and teachers, to name a few.

The legitimacy of hand tattoos in Australia

It does not amount to illegality to endorse hand tattoos in Australia, and no such law currently exists and or passed by the Australian Senate. However, it is a criminal breach of law in Adelaide to own tattoo parlour, and at the same time, the owner linked to any motorcycle gang. It was done to eradicate gang activities in the Adelaide city, which make sense.

General precautions to follow after getting a tattoo

Some of the general advice provided by the tattoo artistes to their customers include:

1. Wash tenderly using lukewarm water after 2 to 4 hours of sporting tattoos.
2. Use any good moisturizing cream and apply smoothly on the symbol.
3. Avoid direct sunlight exposure to the tattooed area.
4. Staying away from swimming pools, bath tubs etc. to avoid the tattoo getting drenched in water.
5. Do not scratch the tattooed area if it itches. If it is uncontrollable itching, seek professional doctors advise immediately.

Health risks involved with tattoos

There may be health risks involved if the tattoo needles are not sanitized as they may be contaminated needles. Complications and challenges may include hepatitis B and C, tetanus and even HIV.
Reasons that make tattoos popular

Tattoos are most popular in the younger generation due to their stylish and elegant inking. Several other reasons for its popularity are emulating rock star idols by their fan following, expressing one’s independence and creativity, and an open window for messaging to the outside world.

Thinking of Tattoo, What Should I Choose?

Thinking of Tattoo, What Should I Choose?

Getting a tattoo is an enjoyable and exciting process for every single individual out there, but, that doesn’t mean that we should be reckless while doing it. Before you go running into the first tattoo shop you see, you need to think about what’s the perfect tattoo style for you, what tattoo artist would’ve done the best work, etc.

It means that a good tattoo requires a lot of thinking and planning, all to make sure that you won’t make a mistake and regret it in the future. That’s why we’ve decided to take a trip down the memory lane, talk about tattoo styles, tattoo history, answer some of the most critical questions that are closely correlated to the art of tattooing and ultimately, that will help you pick your perfect tattoo.

How Do I Differ a Different Kind of Tattooing?

First things first, we need to talk about different kinds of tattooing. Tattoo artists Sydney claimed that the reason for that is the fact there are many different styles of tattooing, which can give you amazing results, but of course differently. For example, if you step in a tattoo shop and ask for a tattoo of a rose, you can get that tattoo done minimalistic, where it will be a little less noticeable. You can also get it done in a traditional way, where that tattoo will have bolder lines, brighter colours, etc. It is what we meant when we said that “the same” tattoo can look way different based on what style was it done in. For you to pick the style that suits you the most, we suggest you research a bit more to get familiar with other styles of tattooing such as Black Work, Cover-Ups, Dotwork, Realistic, Tribal, etc.

What’s the Difference Between Traditional and Neo-Traditional Tattoos

Even though many people say that there aren’t any differences between traditional and neo-traditional tattoos, they are subtle, and they do indeed exist. When we’re talking about traditional ones, we are talking about tattoos that consist of very dark and heavy lines and really solid colours. Their design is kept simple, and considering that they generally don’t use colours other than blue, green, yellow, brown, the colour palette that they use is pretty small. On the other hand, even though neo-traditional tattoos use the same technique as the traditional ones, they have a more complex design, and they use more colours, which makes them “somewhat” different and unique.

What is The New School Tattooing?

The new school tattooing is a style that relies heavily on vivid tones, somewhat rounded shapes, and extremely cartoonish concepts. Even though this style is unique, it still uses some of the same ideas that traditional tattooing is known for, such as bold lines and large shapes. It’s also worth mentioning that the new school style influenced by comic books, tv shows, video games, etc.

Which tattoo considered as The Best One and Why?

This question is probably the hardest one to answer, and the reason for that is the fact that it’s purely subjective. You get the one that you like the most of the means to you the most because you know what they say, the beauty is in the eyes of the beholder!

How did people tattoo in ancient times?

Even though it might seem like something that just got popular in the last couple of decades, tattooing is very old. Some historians say that the first tattoos can be traced back to 3300 BC. They found on a body in the alps, and it believed they were made by rubbing pieces of charcoal into the cuts. The design was nothing special, considering that these “tattoos” were just a couple of connected dots, but hey, that’s a good enough start for future generations!

5 Best Tools That Will Help in Getting Rid of House Paint

5 Best Tools That Will Help in Getting Rid of House Paint

1. Heat Gun

Though not very useful in removing the paint per se, it does soften up the dry and hard paint which makes it easier to scrape it off, thus actually being quite useful in some scenario but then again they work a little slow so you should only use it if you need it. Besides, using it quite frequently on dry wood is never recommended due to high temperatures causing a nasty scenario.

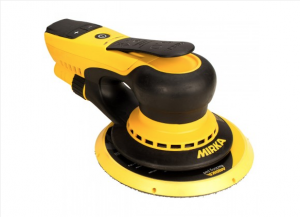
2. Electric Sander

Okay, this one also doesn’t remove the paint by itself, but it helps identify when you’ve reached solid colour. The colours are not too expensive either (around 30-40 bucks), so it’s better to have it and not need it than need it and not have it.

3. Wire Brush

Time to use that brute force by using a wire brush! It’s excellent at taking off peeling paint and doesn’t require any prior setup like an electric sander but anything other than peeling paint means you’re going to have to go for a different choice. Plus, they’re even cheaper than an electric sander so once again, won’t hurt to have one in case you need it.

4. Paint Shaver

Mind you; this isn’t one of those tools that claim to shave paint and can’t live up to the claim. This one from the brand name ‘The Paint Shaver’ can do what it’s advertised to do. The method of use is quite simple; A vacuum pulls in all the stripped paint and stores it for disposal, and all of this seems reasonable until you’ll realize that you’re going to spend a fortune on this around $600. But, if you can spend that kind of money, professional painters swear by it, so why not?

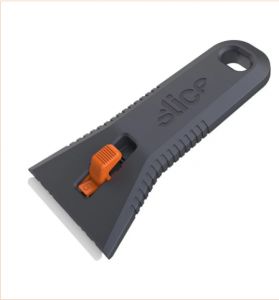
5. Manual Scraper

When things don’t work, it’s time to go old school by manually removing scraps of paint with a scraper. It’s a piece of metal, so it’s dirt cheap, and it just only works. However, how effective it is is dependent on your muscle power, so get ready for sore hands if you have a large area to work with paints. 

Top 7 Paint Problems & How to Fix Them

Top 7 Paint Problems & How to Fix Them

A simultaneous cheer and sigh of relief go up when the surroundings are newly painted. Within a couple of years, there come up with various paint problems. Well, it does not have to be that way.

The key to ward off different paint problems; is to understand the causes of numerous said failures and then how to fix them. Specific types of issues, along with their remedies, are listed below.

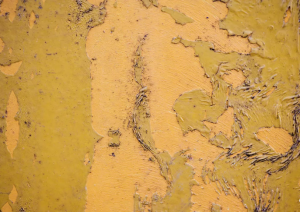
1. Alligatoring

A prevalent issue leading to failure of paint is alligatoring. Well, it so as the cracked paint resembles the skin of an alligator — this issue caused as the paint applied in too many layers leading to inner layers losing elasticity. With a change in temperature, the surfaces expand and contract and the brittle paint breaks.
The issue can resolved by removing the old paint entirely by scraping and sanding. The surface should then be primed with high-quality water-based primer and painted with top quality exterior water-based paint.

2. Blistering

This failure arises by moisture getting behind the paint, or by painting over damp surfaces. Moisture blisters in paint usually occur when moisture evaporates to form vapour bubble under an impermeable layer of colour, especially on new or oil coatings.
To get rid of blisters first try to remove the source of moisture and then scrape and sand the surface.

3.Efflorescence

The white or yellowish usually mineral salt formed on plaster due to moisture migrating through the surface, evaporating, leaving mineral crystals behind. Efflorescence is hygroscopic and will continue to accumulate.

To prevent this issue before using the acidic solution, flood the surface with clean water and then allow the solution to set before scouring off the efflorescence with a stiff brush.

4.Sagging or running

These occur when the paint applied over glossy surfaces, or due to excessive paint thinning, or paint is applied to a dirty surface or in weather below the recommended temperature.

Proper application of paints and surface preparation will help eliminate sags and runs. These sometimes are an indication of an inexperienced painter.

5.Poor stain resistance

You are using lower quality paints that are porous in nature and application of paint on unprimed substance.

Prevention of this is possible with the use of higher quality latex paints that contain more binder, that helps prevent stains from penetrating the painted surface, allowing easy removal according to painting services Melbourne.

6.Surfactant leaching

Surfactant leaching failures show up if there is an incompatibility between the primer coat and finish coat.

To avoid by making sure that the surface to be painted is dry and the cover is effective in wet weather.

7.Wrinkling

Wrinkles may cause paint is applied too thickly, or colour is not brushed out. The best remedy is after scraping, and sanding wipes the affected area with a damp cloth and prim bare areas with appropriate primer and repaint.
So as we have understood various paint problems along with their remedies, it can lead to early correction and significant reductions in maintenance costs. And hence these issues can be immediately recognized, modified and result in immediate rectifications.

Rolling or Paint Spraying: Which Is Better? We Answer!

Rolling or Paint Spraying: Which Is Better? We Answer!

When it comes to painting a wall, it’s no surprise that you’re not going to like it and would prefer to be done with it ASAP. But, which is the right tool to make that happen, is it the trusty roller or the paint sprayer that claims to do it better?

Let’s find out:

Let’s start with a basic introduction of what each thing does: with a roller; you’ll be using the tool to roll the pain with equal proportions on a wall whereas with a sprayer you’ll need to do so prepping after which it’s a relatively fast procedure.

But, what gives the roller an edge over spraying is that you won’t need to do any prep mentioned above which involves masking those zones on which you don’t want the paint to spray. There are quite a few advantages of just not letting these such as less wastage since roller puts every drop of the paint on the surface instead of spreading around on unintended surfaces.

However, that doesn’t necessarily mean that spraying doesn’t have it set of benefits. The amount of detail that you can give to objects is not possible with rollers; it’s incredibly fast if you are painting places like your garage or ones without any unintended surfaces around since it warrants no prep time at all.

In a nutshell, it depends on your budget, your needs, and your surrounding area. To answer our question on the title: Spraying is better because it gets the work done faster and rolling is better because you will be keeping wastage to a minimum and thus save some cash at the end of the day.

So, before you decide to choose between one, take a look at the brief comparison table below that has all the points mentioned and then some, to see what works best for you.